Showing posts with label Tutorial. Show all posts

Thursday, December 1, 2016

Pocket Prompts 21 with Big Picture Classes

Hello everyone! I'm so glad to be announcing that my first class with Big Picture Classes has launched ! It is called  Pocket Prompts 21.


Here is a little information about the class:
Each month, BPC bring you a new Pocket Prompts class from an inspiring pocket-page maker. This month, I will be sharing five photo prompts and five journaling prompts, as well as a look into my process of putting a page together from start to finish. 


What will you learn
Ever want to start hybrid scrapbooking, or pocket pages scrapbooking? Or are you running out of ideas for project life and memory keeping? I will be sharing ideas of photographing and journaling your day-to-day activities, as well as tips and tricks for how to get started with hybrid pocket scrapbooking. I will also be sharing the basic use of programs like Evernote and Lightroom for hybrid pocket scrapbooking as well as ideas to embellish your pocket pages in a minimalist and cohesive way.


If you're unsure about taking this class, I have a good news for you. You may sign up for a FREE two-week trial to enjoy this class along with many other awesome classes at Bigpictureclasses!


Hope to see you in the classroom!

Saturday, October 20, 2012

My favourite technique :)

Hello!
Hope you're having a great weekend so far

While making the guestbook/scrapbook 
I was tempted to use my favourite technique for card making
It's something to do with stamping
colourful and water
And time, i added some shine too :)

Here is one card that i made during valentines using this technique
and i though i could share how i made it :)

LOVe the colours :)

Here is how the finished page looks like
on my guestbook project

Close ups
See the shine and the water colour look
and the mix of fabulous colours!
LOVE IT!


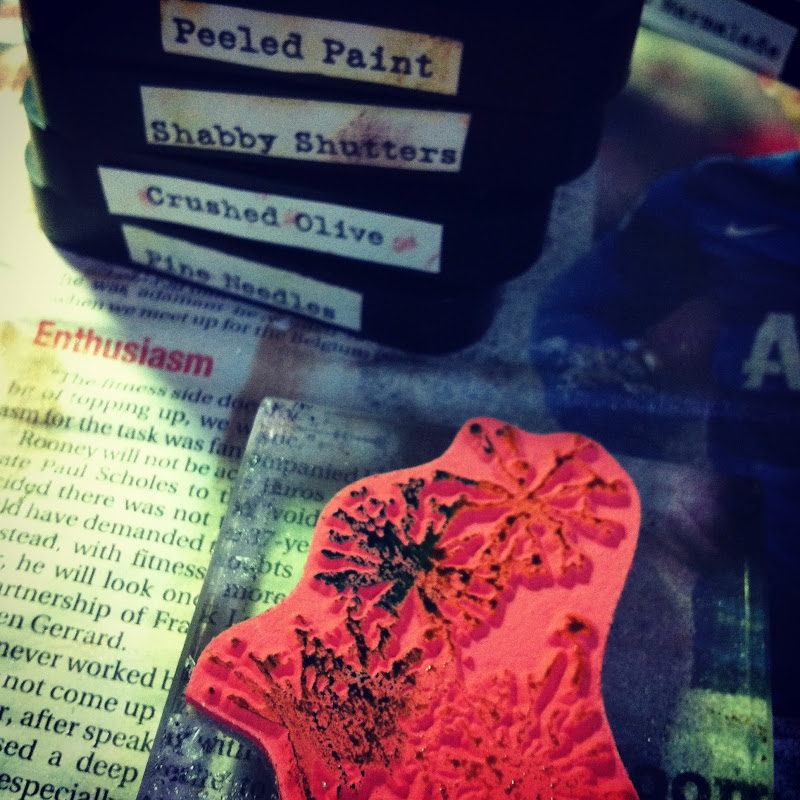
Here is the supplies
You would need 
1. a few colours of dye ink
(I'm using distress inks cause I really lovee the colours)
2. A bottle that spray water
(i usually use tap water, this time I though of adding some shine
Hence i'm using the studio calico mister huey in the shine colour
it's just a glimmer water, add a glittery touch to your project. 
Quite subtle but nice in real life )
3. Your favourite stamp!
( I'm using the tim holtz cling stamp 
from the nature moment collection )


Mount ur stamp onto an acrylic block

Add the darkest colour onto your image first
I just smear direct ink pad to stamp
just be a little careful 

then add the other lighter colours,
also in ascending order or the colour tone
( from darkest to lightest)
this prevent yourself getting the ink pad stained 
i usually have no problem with that :)

then i come back in with the darker colours
to add some touches at the edges of some parts of the flowers
this add a little dimension to the stamped image

now u can see our image is all inked up

take the bottle of spray mist


Mist it about 2-3 times dependng on the size of the image


u can see the ink darkens
and become more watery looking then before
then we are good to stamp

now stamp :)
and you have ur pretty image

i thought could do one that just use all greens in different shades

Hehe this is an example of me misting too much 
becareful if you mist too much water, 
some parts of the ink might flow to other parts
and parts of the image might not stamp clearly
and it might even drip onto your project before you stamp!
(that has happen before to me >< )


well here you go the final product
fun right?
I love mixing the colours up 
and trying different colour combination

Hope you have enjoy this little tutorial
and hope you give it a try
share with me if you do ! 

__________________________________________________


Also want to add
I have signed up for shimelle's neew class called Scrapbook Remix
And so I though I could share my recent paper stash

I was buying so much given that my LSS is having moving out sales
and follow by ware house sales
and all the CHA goodies
I cant resist

So it's time for me to sort out my paper stash before it gets out of control!

I used the cropper hopper divider 
and added some washi tape 
and label by company


Here is part one, some papers sits in between my albums
and somehow 
the comb and hairband just find their way into the hole
haha, kind of a good way to store them too :)
makes me happy when i comb my hair and look at the pretty paper lol


Here is part 2
This rack is from goodwill
a friend of mine RAK it to me
It's really nice of her!
It sits some of my favourite collections 
Beside it sits the container that house all my thickers
and alpha stickers


Love it :) 
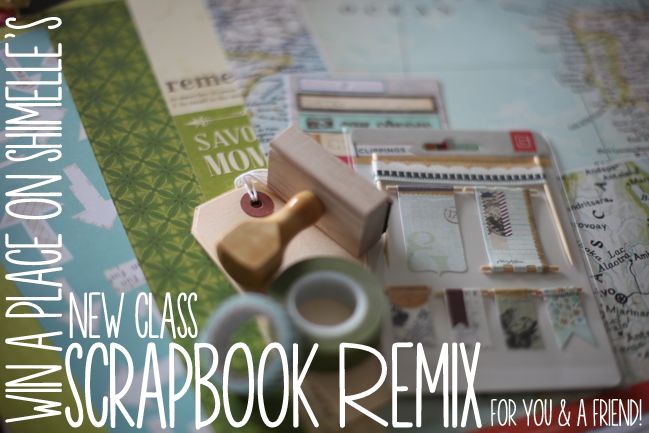
And the class starts coming monday.
It's about mixing the pattern papers
and all the fun stuff.
I can't wait :)
Join in if you can :)

___________________________________________

Thanks for stopping by today :)
then next time!

Sunday, September 16, 2012

A layout with some ideas to share :)


Recently,
one of the LSS has a moving out sales of 60%
I thought of getting a little into the mixed media section of art
hence I bought a few (or a lot) bottles of mist
and some templates/stencils

Here is how I make my mist swatch 
So that i keep an account of what colours i have
and it's easy to bring out , so that i dont buy duplicates

I punched some 1.5" circles from the white cardstock

I misted each circle with my new mist

punch a hole throught them using the cropadile
Label them with the brand and colour

secure them together using binding rings
easy :)


And here is a look of what's like 
experimenting in progress!

I made some background using the stencils
and some journaling cards too!
Also trying out Project Life recently

Love them!


_____________________________________________________

I also have a layout to share :)
It is for the challenge over at CSI 
Case file #36
The last case I 'handled' was 15! 
So long ago!

Anyway, I really do love the monochromatic colour pallet here


Here is my process :)

Used the hexagon stencil,
sprayed a few times with some glimmer mist
and splatter some glimmer glam over

I used the coordinates this time!
So fun to print and cut out the images myself

Love these autumn leaves

Chose a pattern paper from MME 

Paste the photos and layer over some journaling cards
Love the speech bubble!

Decided to make a paper garland using the die cut pieces
(inspired by this project from two peas in a bucket quite sometime ago)
So I punched a hole thru all the pieces
and also my starbucks holer
And thread a bakers twine through the hole and arrange them

Here is how it looks like all thread up

secure the both ends using Tim Holtz tiny attacher


Add title using the Jillibean soup alpha stickers!
Love the font

Journaling added 
and it's call done :D

Thanks for stopping by and 
till then :)


*P.s. Be sure to check back my blog next week

 as I'm posting a great giveaway !! 
You don't want to miss that :p*


Tuesday, July 24, 2012

Scrapbook and crafting classes :D


As some of you have requested for scrapbooking classes
I have decided to go ahead and plan a few classes for you :) 
There are 4 classes available for the month of august.
 (24th July to 12th August)

- Mini Eco Album (left one slot!)
- Tag books class
- Small travel paperbag album
- Card class

This is the soft launch of the classes
 that i wish to share with you the techniques
 and ways to make mini albums and cards.

Here is a little more about the scrapbook classes at pepper creations
  • Each class will have 3-5 people 
  • Price includes materials(acid free) and tools that you are going to use in class.
  • Classes do not have a fixed date, after gathering at least 3 people for the class, we will discuss the dates that all of us can make it

For those who are interested, please email me at 
greentea_world_56@hotmail.com
and I will send you a word document
 with all the classes available
and the classes details


Some sneaks preview of the classes


Please feel free to share this class with friends 
who have yet to know about pepper creations 
but are interested about scrapbook classes.

I look forward to share these creations with you all :D


Monday, June 27, 2011

[ #4 Piradee's' Challenge ] - Turning 21st :D

Ok, I shall call this an official start to do 12x12 LO :D

Decided to take part in the MWL scrap challenge
Here is what i have :)


I kind of like how it turns out .
Shall try to describe how i made this.

First, i took some paper from prima paper stack - melody
and cut out the beautiful branches and flowers.
Unlike others , i kind of enjoy detailed cutting
(though i'm not perfect at it)
Cos it's when i dun need to think about what i'm doing
and let my brain rest for awhile . hehe


Nice branches

Then i take more papers and cut the birdcage
and some strips of paper

Then , i Stamp butterflies onto acetate using stazon ink
and cut them out.


Using distress inks to ink the sides

Spraying the tags with some glimmer mist


Use transparent pop up glue dots to pop it up on my LO. Love the shadow effect :D


I assemble the photos onto the cardstock such that
i create a pocket for me to insert tags for journalling :)

And tee dAAA!
I'm satisfied with this :P